Have you ever seen artwork displayed online with a mount and frame around it? It can look good and though you shouldn’t always display your art like that online, it’s useful to know how to do it. I’ll outline how I do it below.
Now that I know how to do it, I can literally put three borders and a nice frame around a picture in less than two minutes, so it’s not complicated despite looking like there’s a lot of steps. Many of those steps are the same but with the settings changed slightly.
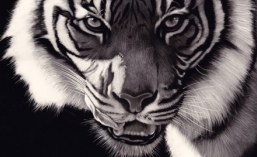
This is the before version
")
And here’s the version with border, frame and glass
 with frame")
First you need an image editing program. I don’t want to stop people buying good programs but I do want to alert people to the fact that there’s a brilliant one available which will do basically everything that the best programs will do, free of charge. Get Gimp here http://www.gimp.org/downloads/
Follow the setup instructions and when it launches, it will look like this (this is current as at writing but will be subject to upgrades). Three windows will open up the first time. One is the toolbox, one is the layers box and one is the image container.
")
As you can see, I’ve already gone to open an image file in the menu in the image box
Now with the image open, go to Filters/Decor/Add Border
")
Another box will open up called Script-Fu: Add Border. This is where you can play with the settings.
")
The first thing I’m going to do is create a mount. In this case I’m setting the x and y border sizes of the mount (the width that the mount will become) at 100 pixels and I’m going to set the colour to white. The width of the border and/or frame will vary depending on how large your picture file size is to start with. My picture in this case has been reduced to 800 pixels high x 435 wide. To set the colour, click on the colour bar and you’ll be able to put your curser wherever you want it in the colour selection panel, or if you want white, just type into the HTML box the code for white, which is ffffff
Now you need to reduce the delta value on colour to 1 (I’ll tell you why later). Click ok and you’ll have a white mount around your picture. I stretch the edges of the picture or maximise it so I can see the border.
Now we want to put a frame around it. Open the add border box up again and reduce the x and y borders to whatever size you want. In this case, I’ve used 50 (which will be the width of the frame), change the colour to what you want (I’m going for a nice grey here and have typed a grey code in of 646464, but you can also click inside the colour selector to get whatever you want). Whatever code the colour comes up at, write it down for later.
You now need to change the delta value, in this case I’ve gone to 40. This is what makes the border look like a frame, giving you the frame corners and shading.
")
Click ‘ok’ and you’ll have a nice frame around the border.
")
This next stage can shape the frame a little. It doesn’t make a massive difference but you could try it to see if you want it. Go to Filters/Decor/Add Bevel
")
and a dialog box will come up where you can set the ‘thickness’ to the maximum 30
")
Click ‘ok’
Now that you have your border and a nicely shaped frame, you might want to make it appear as if it’s behind glass. This can be achieved by going to Filters/Light and Shadow/Xach-Effect. A box will open and you can leave all the settings at the default level and click ‘ok’.
")
Your frame will now have a shadow that makes it look like there is glass in it
")
Now, with the settings for Xach-Effect left at default level, you will notice that your frame is lighter than before. If you want it to stay the same colour, use the code you wrote down when you created the frame, click on the box that says “Highlight Colour” and put that code into the field called “HTML Notation”. This will stop the frame from going lighter.
If you are ever unhappy with a choice, you can go to Edit/Undo. With Gimp there is a limitless ‘undo’ range.
If you want to not only create this ‘glass’ look but also want a shadow behind the frame as if it were hung on a wall, instead of using the Xach-Effect, you could use the “Drop Shadow” effect which is also in Filters/Light and Shadow. Again, just use the default settings but here, your frame won’t change colour.
Here’s an example. I’m not a fan of this one as the background seems to stay white and as you can see, that might look good on a white page but not on a page of any other colour. Great for putting in documents like ‘Word’ for example
")
Now it comes time to save your picture. In fact, I suggest saving your picture regularly whilst you are editing just in case your computer stalls. I always suggest this, no matter what you are working on. Go to File/Save as and type the name you want. If you save it now, this new version of Gimp will give your file an ‘xcf’ format automatically. This is a great format as all changes are saved in layers and you can edit it at a later date. However, you will also need to save it in a regular picture format too, so go to ‘save as’ again and change the xcf (after the dot) to jpg. It will then tell you to export it and then you can set the quality. By default it comes up as 85%. I just slide this up to 100%.
Using the above principles, it is possible to create other effects such as double mounts of different colours, bevel edged mounts, (notice with my gorilla I’ve put a border around the image so the white part of the image doesn’t get lost in the white mount) etc etc. Here’s an example with a few borders. I probably wouldn’t use these colours in a frame but they are there to show you the possibilities.
 test")
I hope this has been of use to someone.

Thankyou SO much for this tutorial. I have been looking for something like this for a while now. It is very easy to follow and my images look great. It’s perfect. Thankyou!
just learned a new skill, awesome, thank you very much, keep up the good work and when in nairobi drop me a mail.
Thank you very much for posting a tutorial on virtual framing I can actually follow! This has been a big help to me ~ thanks so much!
Thank you so much. This tutorial is so helpful. I found it so beneficial. Really grateful. Thanks again.